Connecting via Wi-Fi / built-in WebDAV server
The built-in WebDAV server allows you to easily transfer files to the Local Files location in Textastic from your Mac or PC via Wi-Fi.
macOS and Windows include WebDAV clients so you can use Finder and Windows Explorer to manage the files in Textastic.
Textastic is tested against macOS Finder, Windows Explorer, Cyberduck, BitKinex and the Total Commander WebDAV plugin.
Textastic also includes a WebDAV client in addition to the WebDAV server.
Starting the WebDAV Server
Tap the WebDAV Server button in the bottom toolbar to open the WebDAV screen.
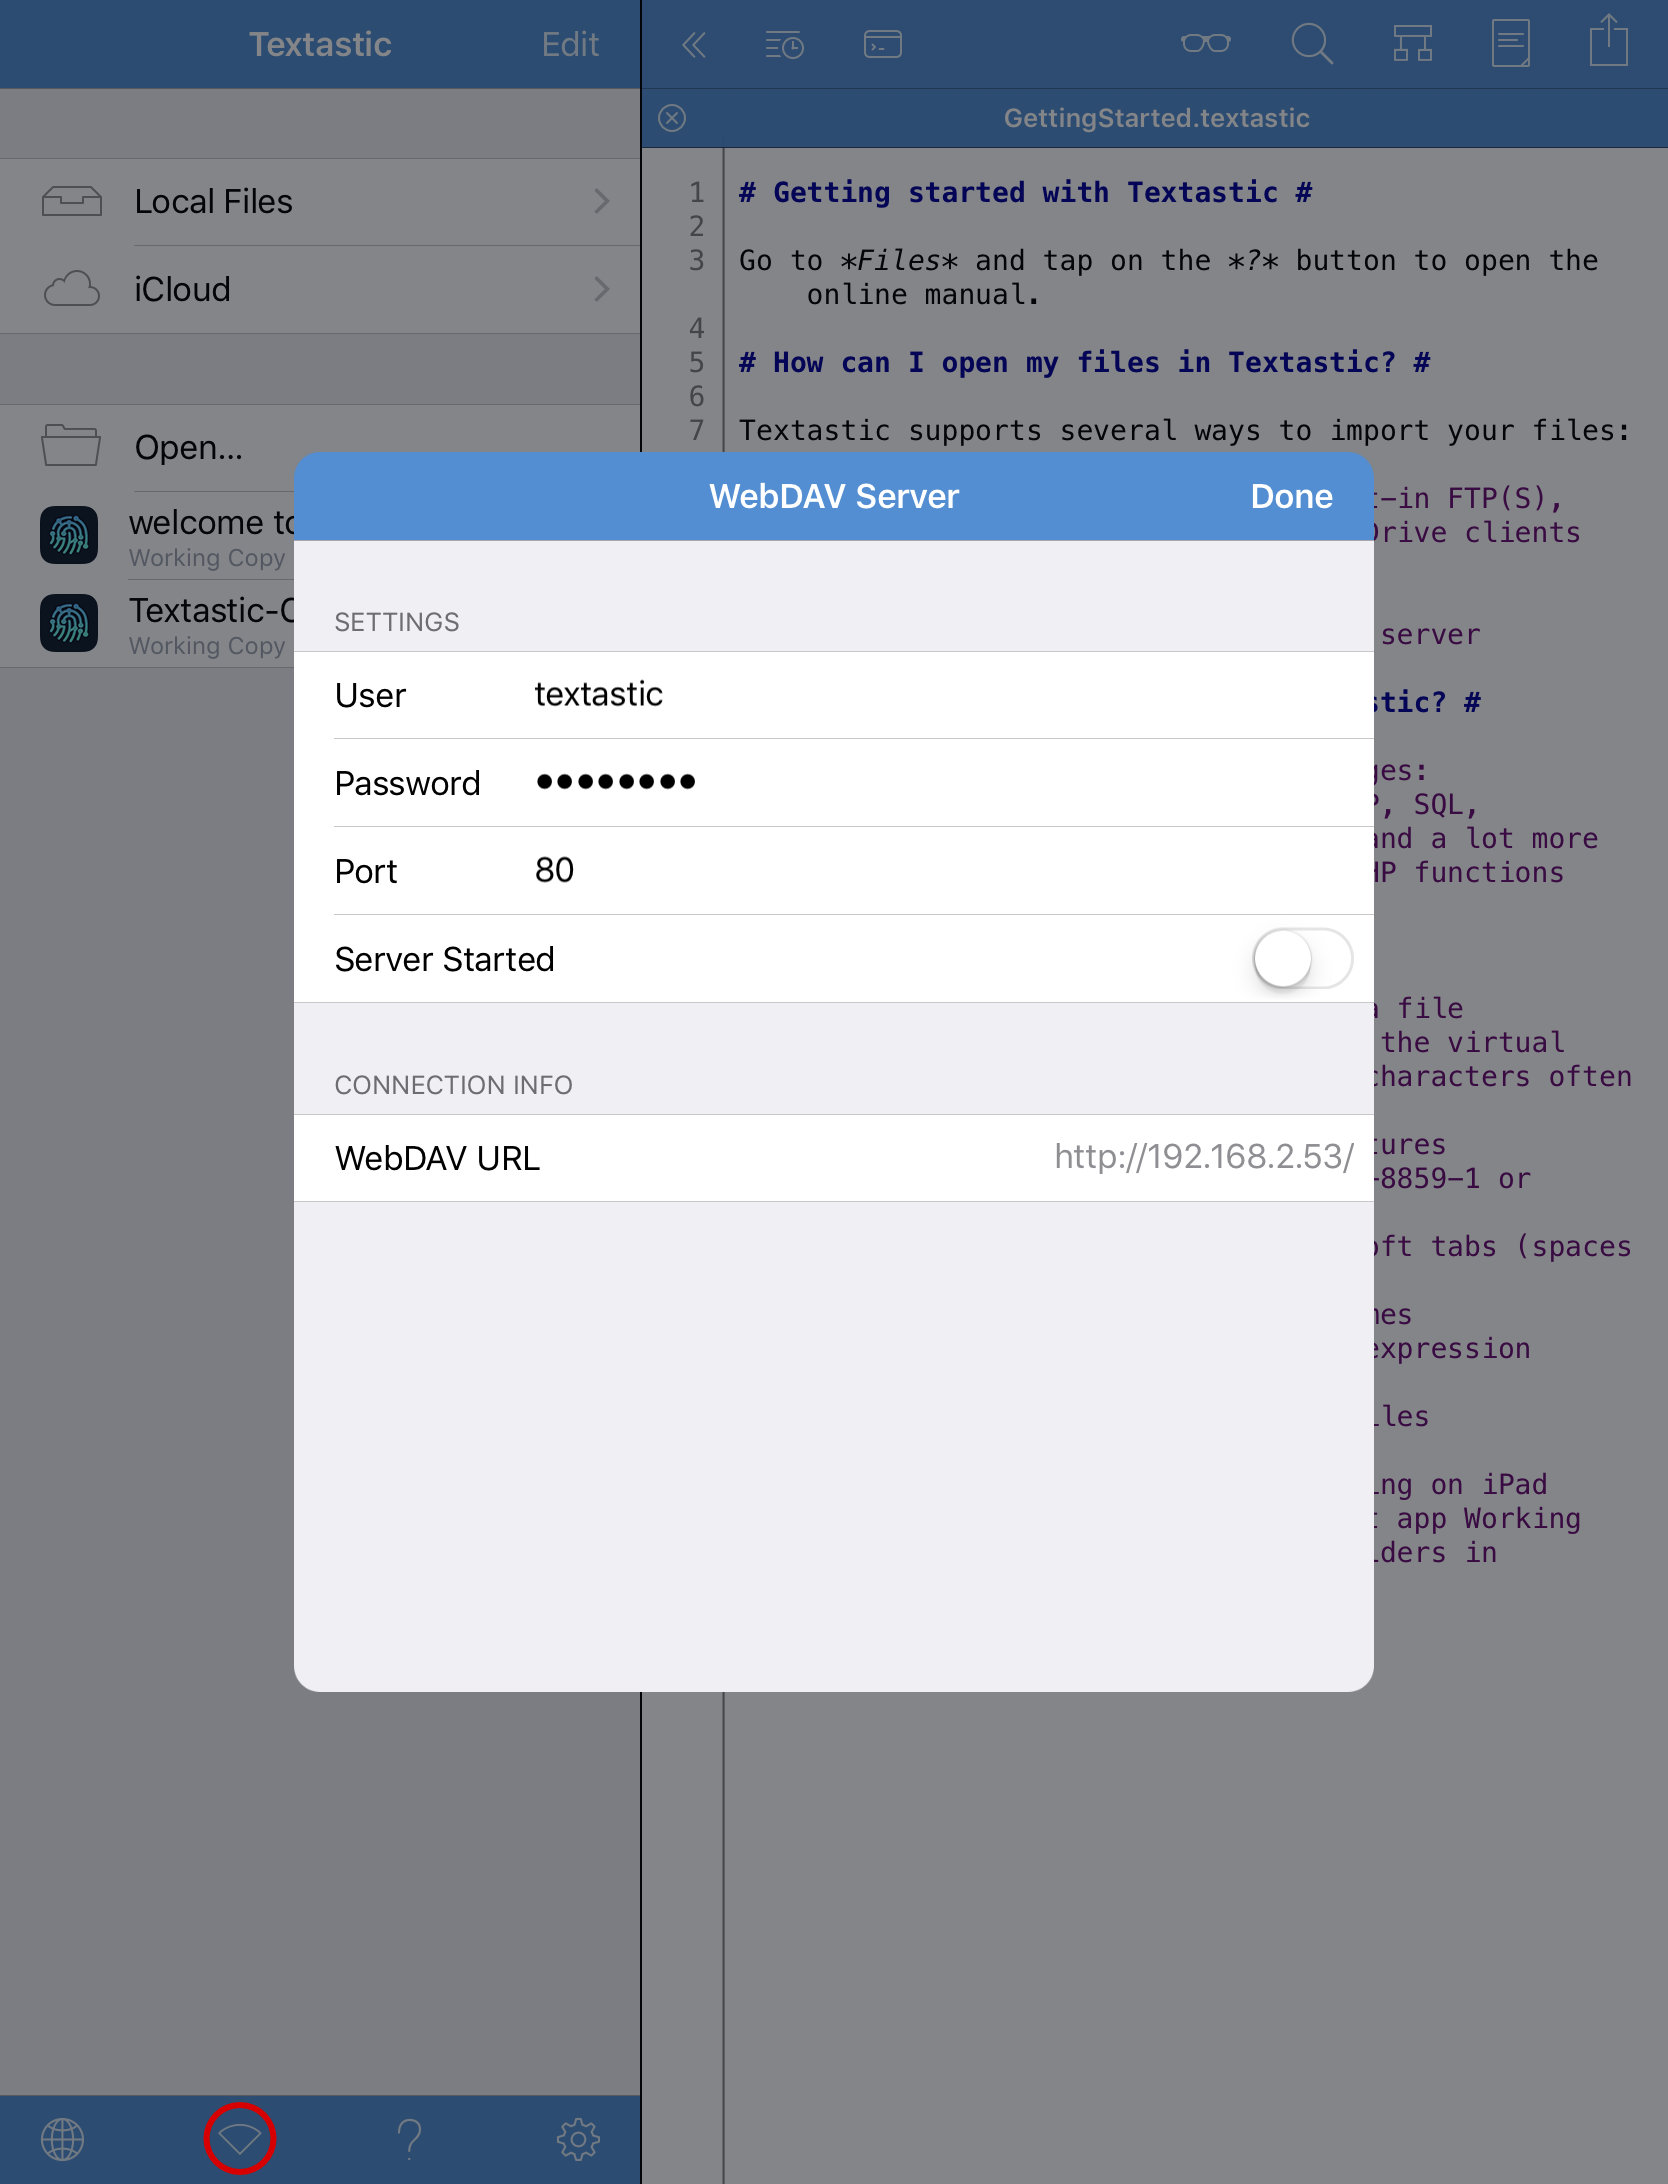
The WebDAV server always asks for user credentials. By default, the User is textastic
and the Password is password. It’s recommended to change these settings before
starting the server.
You can choose a custom Port or use the default port 80.
Start the WebDAV server by flipping the Server Started switch to ON.
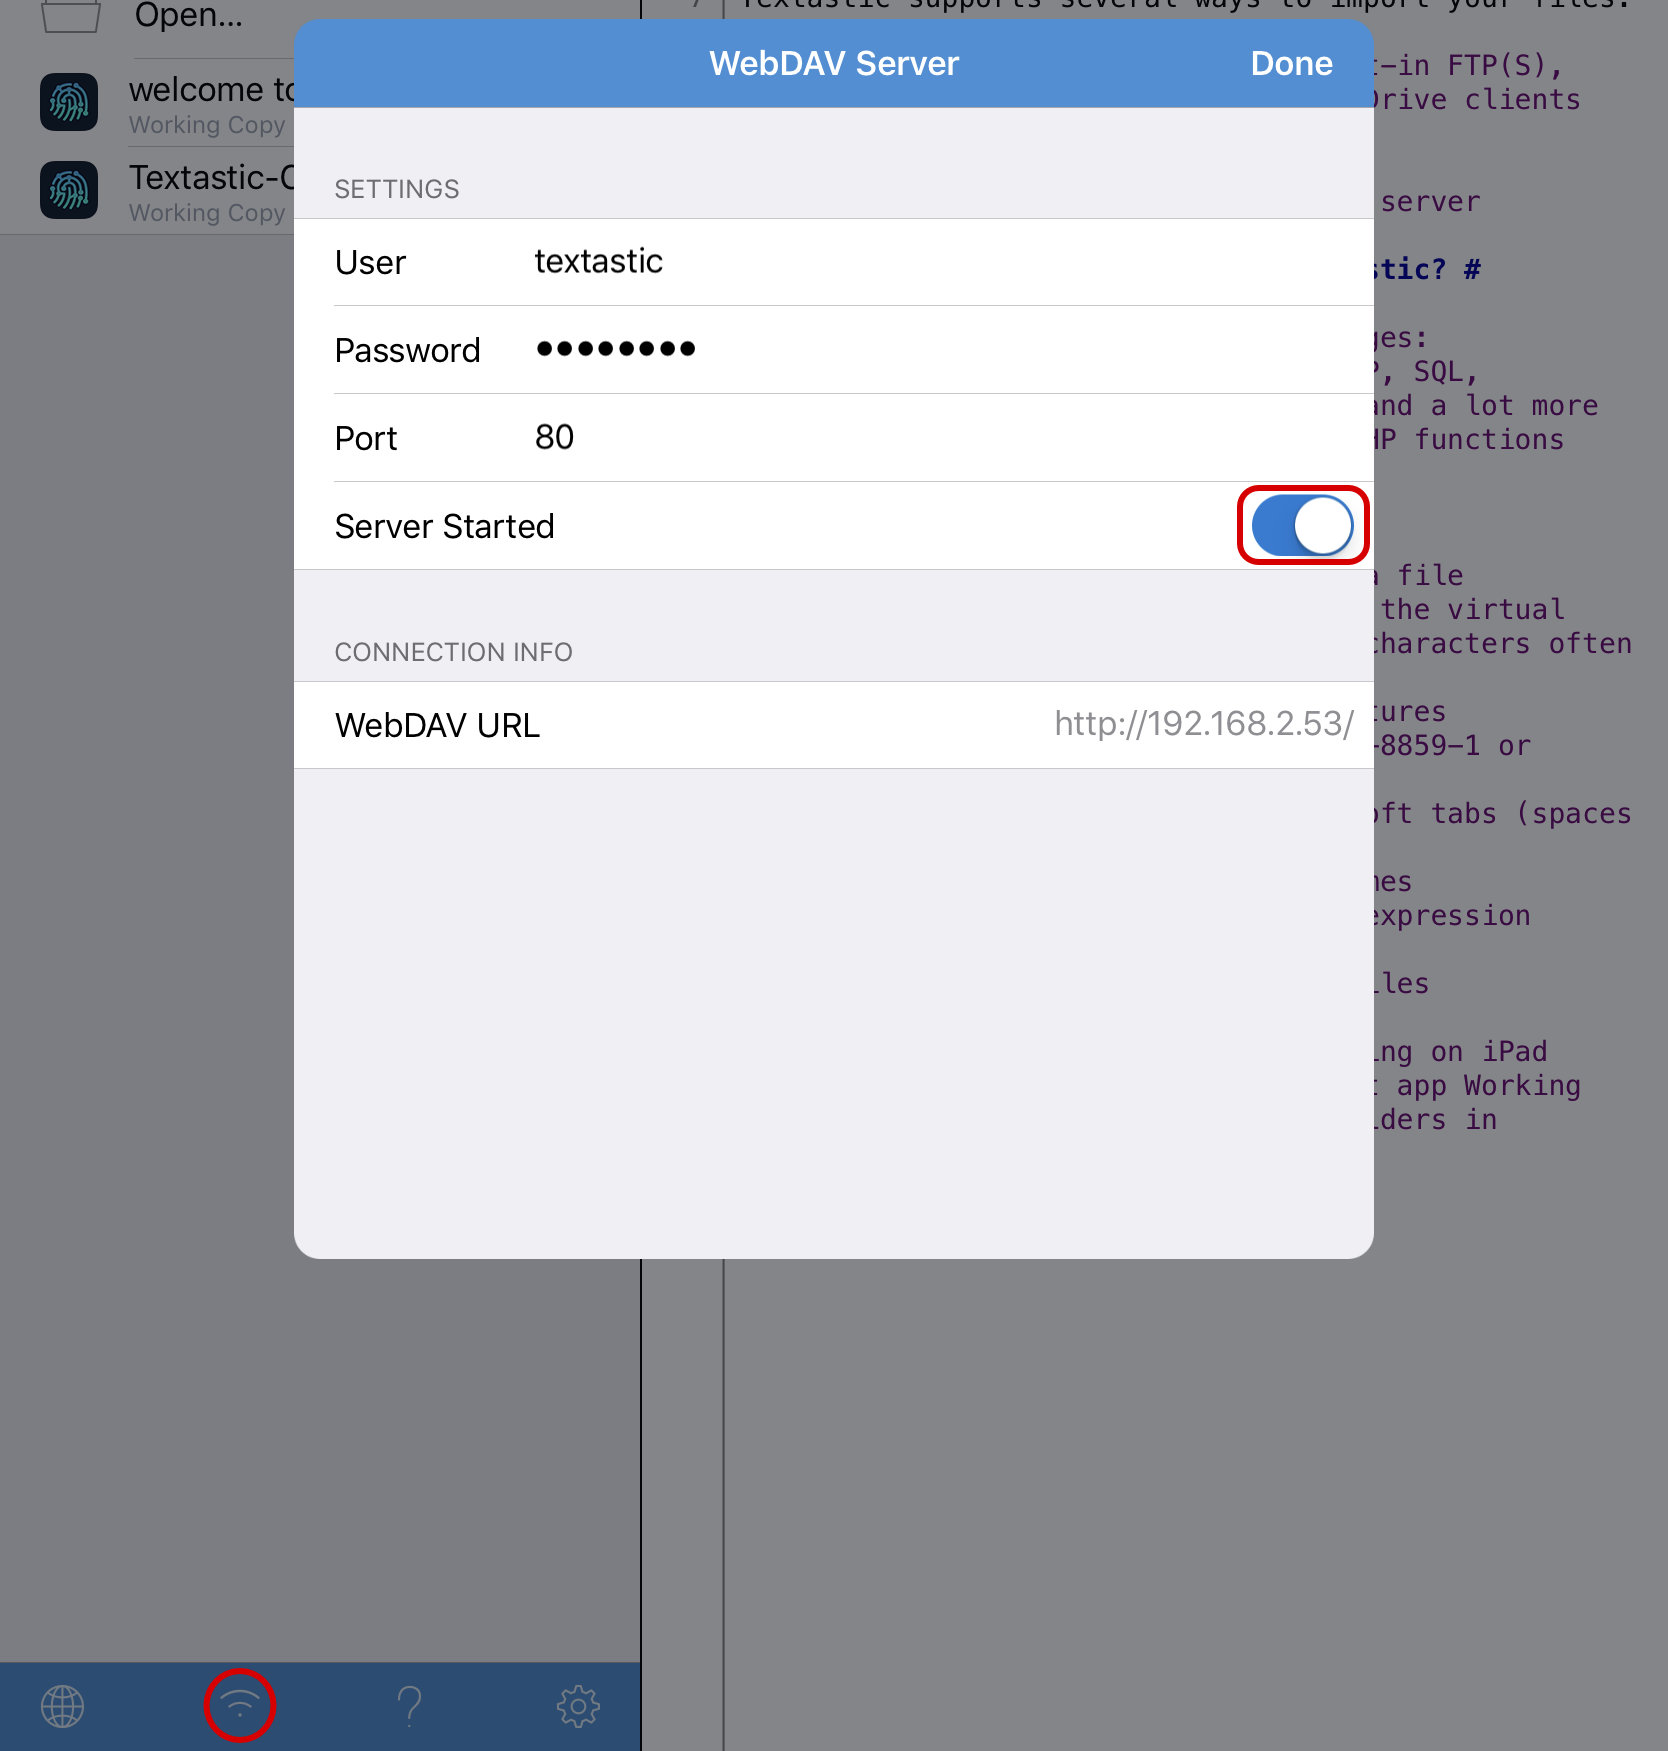
The button’s icon in the bottom toolbar will change to indicated that the server is started.
Note
Your iOS device will not go to sleep as long as the WebDAV server is running and Textastic is the foreground app. Use the power button on your iOS device to manually put it to sleep.
The WebDAV server is only running when Textastic is running in the foreground.
Connection Requirements
Your Mac or PC must be connected to the same network as your iOS device running Textastic.
The iPad or iPhone device must be connected via Wi-Fi.
Connecting to Textastic with Finder
- Switch to Finder
- Choose
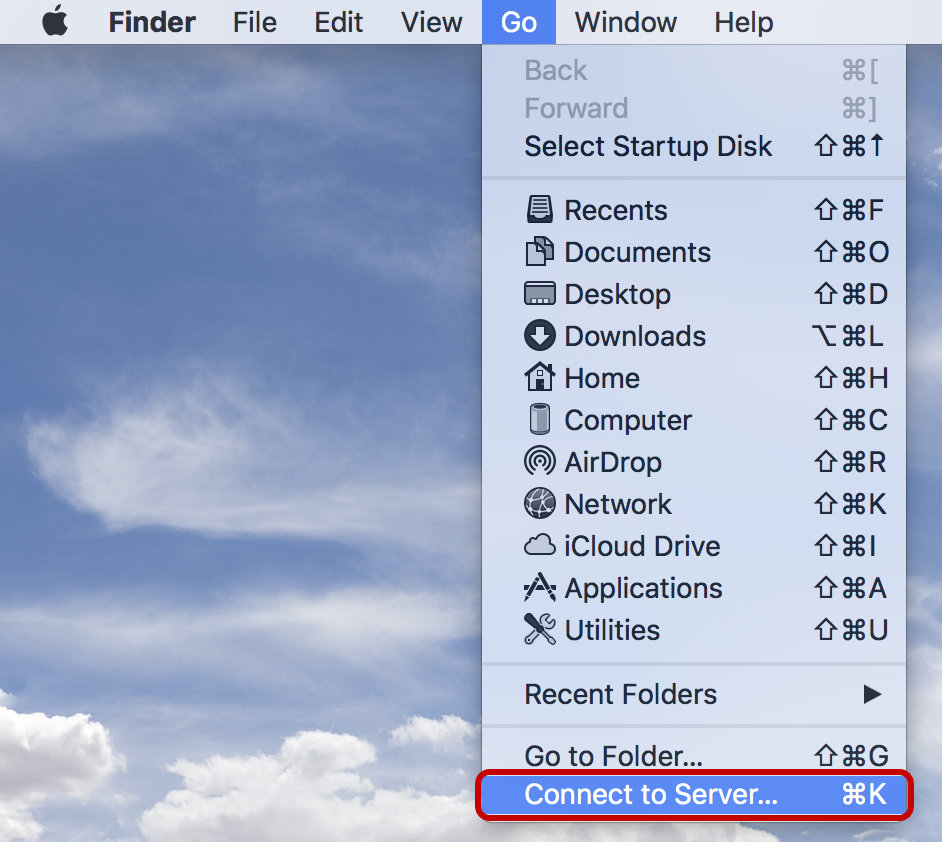
- Enter the URL from the Textastic WebDAV screen in the Server Address field
- Click Connect
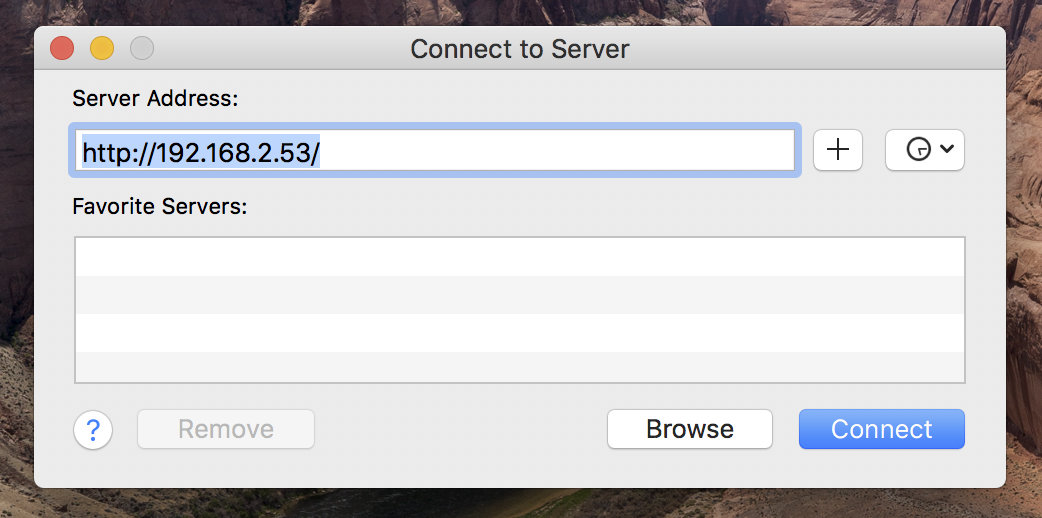
- Finder may warn you that this is an unsecured connection because the WebDAV server does not use SSL. Click Connect
- Enter the Name and Password you chose when setting up the WebDAV
server (defaults are
textasticandpassword). - Click Connect
You can now use Finder to manage the files.
Connecting to Textastic with Windows Explorer
Windows users have two options for connecting to the Textastic WebDAV server: You can either map a network drive, or create a network location. Both methods are described below.
This should work in Windows Vista, Windows 7, Windows 8, and Windows 10.
Method A: Map a Network Drive
- Open Explorer and go to This PC or Computer.
- Click on the Map Network Drive button in the toolbar.
- Enter the Textastic WebDAV URL into the Folder field.
- Click Connect using a different username to enter your username and password.
- Click Finish to create the new drive letter.
This will map Files to a network drive with a name such as: DAVWWWRoot (\\192.168.2.53) Y:
To reconnect in the future just open this network drive from Computer.
Method B: Create a Network Location
- Open Explorer and go to This PC or Computer.
- Click on the Map Network Drive toolbar item.
- In the Map Network Drive window, click Connect to a Web site that you can use to store your documents and pictures, click Next.
- Select Choose a custom network location, click Next.
- In the Internet or network address field, enter the Textastic WebDAV URL
- You will be prompted for your username and password.
- Enter a name for the connection and click Next.
- Ensure that Open this network location when I click Finish is checked and click Finish.
In the future you can connect simply by opening “My Network Places” and double-clicking the network location you created. You may need to select “Refresh” from the window’s context-menu to ensure that Windows has an up-to-date view of your files and folders.
Note
If you change your username or password you may need to re-create the network drive or network location to gain access to the files.